Currently Empty: £0.00

September 19, 2026
0 Comments
What Is a Jaffle Iron? How to Use One (UK Guide)
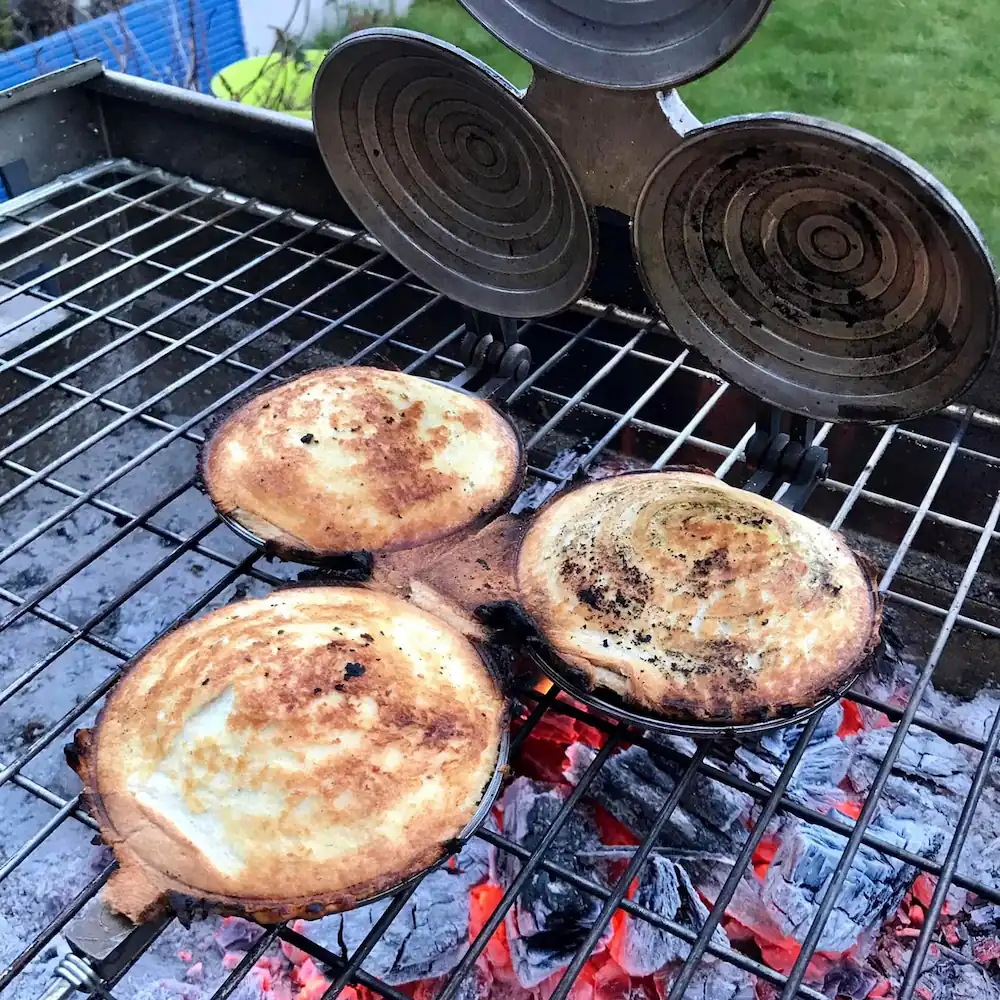
If you’ve never heard the word “jaffle” before, you’re not alone. Most of the UK hasn’t, and that’s exactly the gap I’m here to close. A jaffle iron is a hinged, long-handled press that seals two slices of bread shut around a filling and toasts the whole thing over an open flame. Think of it as a campfire toastie press that does the sealing and the cooking in one move, with a proper crimped, sealed edge so nothing leaks out onto the coals.
I’ve been putting a jaffle iron over braai coals for the better part of two decades, and it’s still one of the pieces of kit I reach for the most. Not for the big Sunday spread, but for the moment after, when the coals are dying down and everyone’s still standing around the fire wanting one more thing to eat.
Where the jaffle iron actually comes from
The jaffle iron is an Australian invention, not a South African one. Worth saying up front, because I get asked. It was patented in June 1949 by Dr Ernest E. Smithers of Bondi, registered with the Australian Design Office under design number 27089, and marketed at the time as a “pressure toaster.”
It built on a much older idea. Medieval wafer irons and Belgian waffle irons had been pressing filled dough between hinged metal plates for centuries. But Smithers’ version was the first built specifically to seal a sandwich shut and toast it over a fire.
It caught on fast through the 1950s as a novelty entertaining gadget, and versions of the same idea turned up independently elsewhere: Americans were doing much the same thing with “pudgy pie irons” from the 1920s onwards.
What I inherited from my own family’s fireside cooking wasn’t the Australian jaffle craze specifically. It’s the same basic principle every braai culture has landed on independently: bread, filling, direct heat, sealed edges. Doesn’t matter what you call it. It works because it works.
Cast iron vs electric — which one to actually buy
Cast iron (over coals or gas): This is the one I use, and the one I’d point most people towards for a braai setup. It’s built for direct heat, it seasons over time the way a good braai grid does, and there’s no cord or plug to worry about standing next to a fire. The trade-off is you need actual coals or a gas ring to run it… no coals, no jaffle.
Electric: Fine for a kitchen countertop, useless at a braai. If you’re buying one specifically to use outdoors over fire, skip it. You’re paying for a feature (the heating element) you don’t need and losing the one thing that makes a fire-cooked jaffle taste different from a kitchen one, which is a bit of char and smoke on the crust.
Our own 3-in-1 Jaffle Maker is the cast iron route. I’d rather answer this question honestly than dodge it: if you’re braaiing, that’s the type you want, full stop.

How to actually use one: step by step
1. Get your coals right first. You want glowing coals, not open flame — the same stage you’d cook meat over, not the stage you’d light kindling at. If you’re not sure what that looks like, I’ve written the whole process out in how to light a braai fire like a pro — the short version is pale grey-white ash with a red glow underneath, usually 45 minutes to an hour in depending on your wood.
2. Butter the outside of the bread, not just the inside. This is the single biggest mistake I see. People butter the filling side and leave the outside dry. The outside needs the butter for colour and crunch; it’s what stops the bread from just drying out and going leathery over the coals.
3. Don’t overfill it. A jaffle iron seals the edges shut under pressure — if you’ve piled the filling too high, it won’t seal properly and you’ll get leakage and burnt drips instead of a clean toastie. Thin, even, right to the edge.
4. Close it, latch it, and hold it low over the coals. Close enough to get real heat, not so close you’re sitting in the flame. Two to three minutes a side is the usual range; you’ll hear it start to hiss and smell butter browning, and that’s your cue to check.
5. Turn it, don’t just flip it back and forth constantly. One flip halfway through, that’s it. Constant flipping just cools the bread down every time and stretches your cook time out for nothing.
6. Open it carefully and let it sit ten seconds before you dig in. Whatever filling you’ve used has been under pressure at near-boiling heat. Give it a moment before you bite.
Filling it with goodness
Ham, Cheese, and Tomato: The ultimate traditional combination with melted cheese and juicy slices.
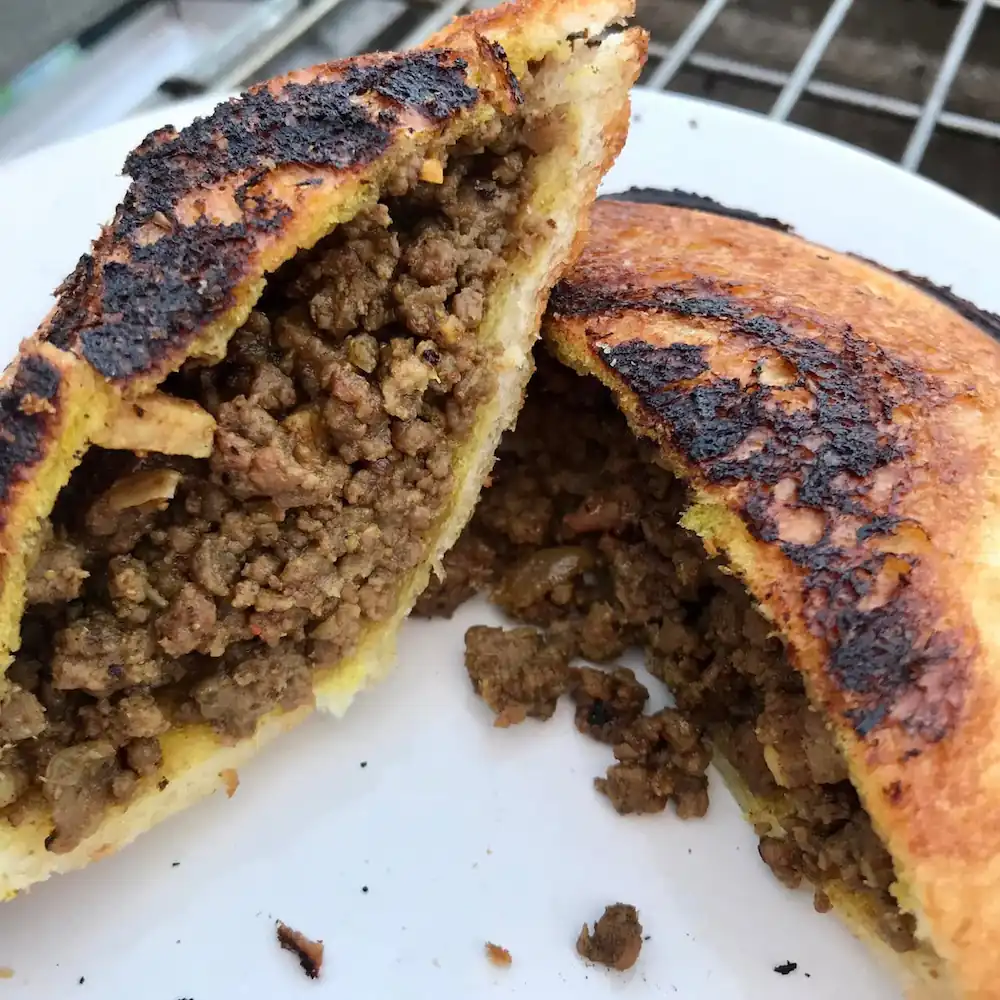
Savoury Mince: Seasoned ground beef or lamb with onion and a splash of tomato sauce.
Baked Beans and Cheese: A budget-friendly, gooey comfort food favorite.
Chicken Mayo: Shredded chicken mixed with mayonnaise and a little black pepper or sweet chili sauce.
Leftover Spaghetti Bolognese: A messy, satisfying way to use up last night’s pasta.
Chakalaka and Cheddar: Spicy vegetable relish paired with sharp melted cheese.
Biltong and Cream Cheese / Pesto: Shredded biltong combined with mozzarella or basil pesto.
Braaibroodjie Style: Mature cheddar, thinly sliced tomato, red onion, and chutney.
Kimchi and Cheese: Fermented spicy kimchi with a rich melted cheese.
Dan’s tip
Keep the filling thin and even, right to the edge. That’s what actually makes the seal hold. Pile it too high and you’ll get leakage and burnt drips instead of a clean toastie.
Jaffle Iron FAQs
What is a jaffle maker?
A jaffle maker (or jaffle iron) is a hinged, long-handled metal press that seals two slices of bread shut around a filling and toasts them over direct heat — a braai fire, campfire, or gas ring. The hinged plates crimp the edges closed so the filling stays sealed in while it cooks.
What's the difference between a jaffle iron and a toastie maker?
A toastie maker is electric and plugs in; a jaffle iron is designed to be held directly over an open flame or coals, with no electricity involved. Cast iron jaffle irons are built for that direct heat and season over time like a braai grid does — an electric toastie maker would melt or warp if you tried to use it the same way.
Can you use a jaffle iron over a braai fire?
Yes — that's exactly what a cast iron jaffle iron is built for. Wait until your coals have burned down to a steady glow (no open flame), hold the closed iron low over the coals, and toast for two to three minutes a side, flipping once.
What can you cook in a jaffle iron?
Cheese and ham is the classic, but leftover braai meat with a bit of chutney is one of the best uses for it — perfect the morning after a big braai when there's meat left over. Keep the filling thin and even right to the edge so the iron seals properly.